How to Restore Old Damaged Photos (Complete Guide)
Every Old Photo Can Be Saved
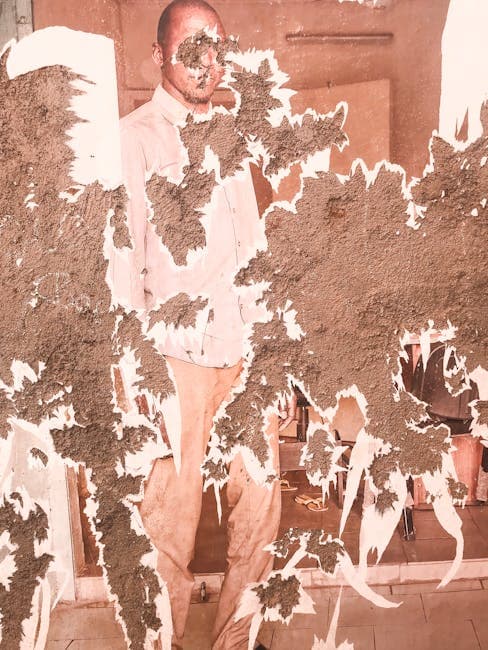
That box of photographs in your closet — the ones with torn corners, mysterious stains, and faces you can barely make out — those are not beyond saving. Whether the damage happened decades ago or during a recent move, modern restoration techniques can bring nearly any photo back from the brink.
This guide covers the full restoration process from start to finish: assessing damage, preparing your scans, choosing the right restoration method, and preserving the results for future generations.
Assessing the Damage
Before jumping into restoration, take stock of what you're working with. Different types of damage respond to different approaches.
Physical Damage
Tears, creases, missing corners, and holes are the most dramatic forms of damage. If pieces are missing, the restoration tool must reconstruct content from context. If the photo is torn but all pieces are present, tape them together on the back before scanning.
Surface Damage
Scratches, scuffs, and fingerprints affect the top layer of the photo. These are among the easiest problems for AI to fix because the underlying image data usually survives intact. Light surface scratches disappear almost completely.
Chemical Degradation
Fading, yellowing, silver mirroring, and color shifts happen as the chemical compounds in photographic paper break down over time. Sepia toning, once intentional, can mask further degradation underneath. AI restoration normalizes color balance and recovers lost contrast effectively.
Environmental Damage
Water stains, mold, humidity damage, and heat warping result from poor storage conditions. Water damage creates tidelines and can dissolve inks. Mold eats through the emulsion layer. These require aggressive restoration and sometimes multiple passes.
Step 1: Digitize Your Photos
Restoration starts with a good digital scan. The quality of your scan directly determines the quality of your restoration.
Flatbed Scanner (Best Quality)
Use a flatbed scanner at 300-600 DPI. Higher DPI captures more detail for the AI to work with. Place the photo face-down on clean glass and use the scanner lid to apply gentle, even pressure. For warped photos, place a heavy book on top of the scanner lid.
Phone Camera (Convenient)
If you don't have a scanner, a modern smartphone camera works well. Photograph the print in indirect natural light — avoid flash and overhead lighting that creates glare on scratches. Hold the phone directly above the photo to avoid perspective distortion. Apps like Google PhotoScan can stitch multiple shots for glare-free results.
Key Scanning Tips
- Scan in color even for B&W photos — color data helps the AI distinguish damage from image content
- Don't crop too tightly — leave a small border for the AI to reference
- Clean the photo gently with a soft brush before scanning to remove loose dust
- Save as PNG or high-quality JPEG to preserve scan detail
Step 2: General Restoration
Upload your scan to the restore tool. This is the foundation step that handles the broadest range of damage.
The AI identifies scratches, stains, fading, tears, and other damage patterns, then reconstructs the image. Processing takes 10-30 seconds. Use the before/after slider to inspect the results, paying special attention to faces and areas of heavy damage.
For severely damaged photos, consider running the restored result through a second pass. The first pass removes the most obvious damage, and the second pass catches subtler artifacts.
Step 3: Face Restoration
Old photos almost always feature people, and faces are what matter most. After general restoration, run the result through the face restore tool.
The face restoration model is specifically trained on human facial features. It reconstructs eyes, noses, mouths, and skin texture with significantly more accuracy than general restoration. This step is particularly valuable for photos where faces were blurry, scratched, or faded beyond recognition.
Step 4: Color Correction or Colorization
If your photo has color shifts — common in prints from the 1960s through 1980s — the restore tool normalizes color balance automatically. But for black and white photos, you have the option to add color.
The colorize tool transforms B&W images into full-color photographs using AI that understands era-appropriate colors for clothing, settings, and skin tones. This step is entirely optional, but many people find that seeing family photos in color creates a powerful emotional connection.
Step 5: Upscaling
Old photos were small. Wallet-sized prints, 3x5 snapshots, and photo booth strips don't have enough resolution for modern displays or reprinting at larger sizes.
The upscale tool increases resolution up to 4x without the blurriness of traditional upscaling. AI upscaling adds real detail — sharpening text, refining textures, and enhancing edges — rather than simply stretching pixels.
Common Restoration Scenarios
The Faded Family Portrait
A formal family portrait from the 1950s that's turned yellow-brown. Use: restore (removes fading) then face restore (sharpens all faces) then colorize (adds color) then upscale (makes it printable at 8x10).
The Torn Wedding Photo
A wedding photo torn in two but both pieces saved. Tape together on the back, scan, then use: restore (removes tear line and damage) then face restore (sharpens the couple's faces).
The Water-Stained Album
A stack of photos pulled from a flooded basement. Dry carefully, scan at 600 DPI, then use: restore (removes stains and mold damage) then face restore (recovers facial detail). Process each photo individually for best results.
The Tiny Passport Photo
A 1x1 inch passport or ID photo. Scan at 600+ DPI, then use: restore (fixes any damage) then face restore (sharpens the portrait) then upscale (enlarges to usable size).
Preserving Your Restored Photos
Once restored, protect your work:
- Save originals and restored versions separately — never overwrite the scan
- Back up to cloud storage — Google Drive, iCloud, or Dropbox
- Print on archival paper — acid-free paper lasts 100+ years
- Share with family — restored photos make meaningful gifts
Get Started
Ready to restore your damaged photos? Upload your scan to the restore tool and see the transformation in seconds. Explore all our AI restoration tools to find the right approach for your specific photos.