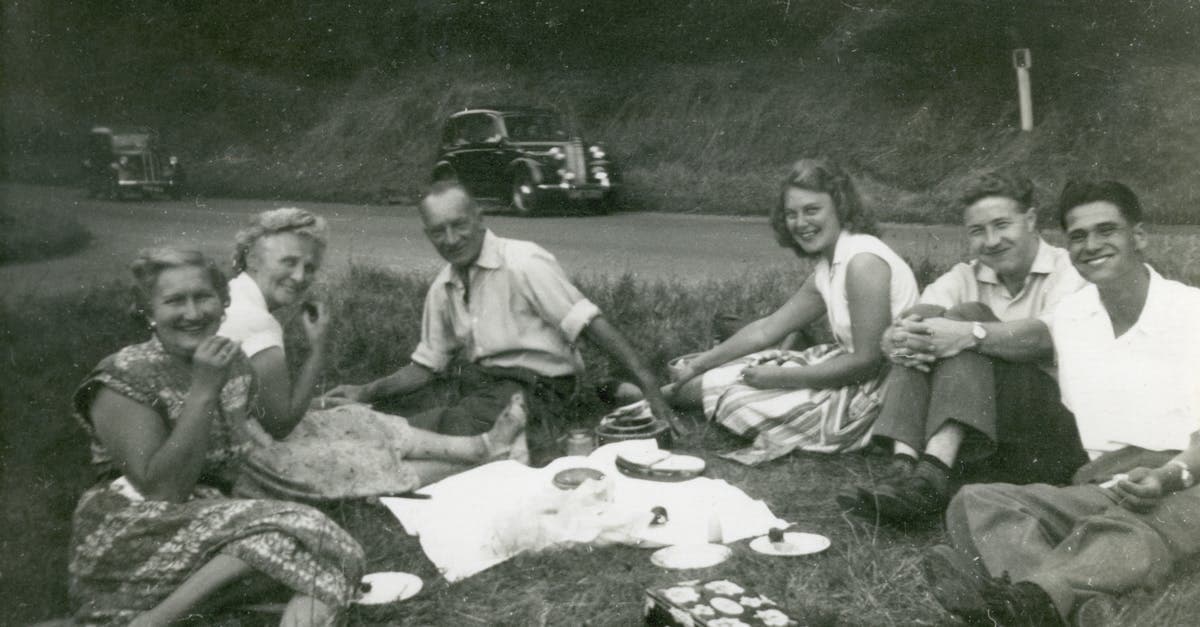
The 1970s is the decade of the Polaroid SX-70, the Kodak Pocket Instamatic, and the first generation of family photographs that look and feel modern. Color was universal by now — black-and-white had retreated to art photography and journalism — and home slideshows were giving way to stacks of 4x6 prints returned from the drugstore in envelopes marked with the lab's name. The aesthetic is unmistakable: warm skin tones, avocado kitchen appliances, wood paneling, flared jeans, and the slightly soft, slightly saturated look of 35mm C-41 color negative film.
The 1970s family album is where most people born in the late 20th century first see themselves. Restoring these photos is emotionally different from restoring earlier decades because the people in them are often still alive, and the restoration often becomes a gift back to the original subjects.
How photographs were made in the 1970s
Kodak introduced the C-41 process in 1972, replacing the unstable C-22 as the industry standard for color negative film. C-41 dyes were significantly more stable than C-22 but still not archival, and prints made during the early C-41 years (1972–1976) show progressive magenta shift as they age. Ektachrome moved to the E-6 process in 1976, a major improvement that produced dye stability far closer to Kodachrome's — late 1970s Ektachromes survive much better than early 1970s versions.
The Polaroid SX-70, introduced in 1972, was the first integral instant film: the negative, positive, and developer chemistry were sealed together in a single piece that required no peeling, no coating, no waste. SX-70 prints are a self-contained chemical system, and their aging behavior is unique in photographic history. The Kodak Pocket Instamatic (110 format) appeared in 1972 with even smaller negatives than the 126 — 13x17mm — producing prints that were often crisp but resolution-limited.
What damage looks like on 1970s photos
The defining failure of 1970s prints is the magenta shift of early C-41 chromogenic dyes. Unlike the 1950s cyan fade, which leaves images looking pink-orange, the 1970s shift is toward a warm magenta that tints skin tones pink and makes whites look lavender. This is most pronounced in prints made between 1972 and 1976, before Kodak refined the C-41 dye stability. Prints from the late 1970s hold up considerably better.
Polaroid SX-70 prints fail in several distinctive ways. The internal chemistry can migrate, producing dark streaks or blotches where developer has pooled. The image dyes slowly yellow, giving older SX-70s a characteristic warm tone that is not present in fresh prints. The outer plastic surface can crack or delaminate from the image layer, especially if the photo has been stored in heat. 110 prints from Pocket Instamatics fade the same way 126 prints do but with even less resolution to start with.
What AI can restore on 1970s photos
PhotoFlip's restore corrects C-41 magenta shift, SX-70 yellowing and chemical migration, 110 format softness, and the general tonal flattening of aged chromogenic prints. For late-1970s Ektachrome on the E-6 process, the AI usually needs to do very little beyond minor color balancing — dye stability is high enough that the originals still look close to correct. Face-restore is useful for 110 and small-format prints where faces are at the limit of the original format's resolution.
What AI cannot do: reverse SX-70 chemical migration that has destroyed the image layer, rebuild a print whose dyes have crossed over completely (a uniform magenta field with no tonal information), or restore a Polaroid that has been bent sharply enough to crack the internal chemistry pod.
Tips for scanning 1970s photos
SX-70 prints should be scanned at 1200 DPI on a flatbed with the lid closed gently — do not press. The image layer is sealed under a plastic surface that scratches easily, and aggressive cleaning will leave permanent marks. C-41 prints scan well at 600 DPI for standard 4x6 sizes. 110 negatives should be scanned at 4000 DPI on a film scanner to extract maximum detail from the tiny format. If you have access to the original negatives from a 1970s roll of film, scan them rather than the prints — the negatives retain more dynamic range and have often faded less than the prints made from them.
How to restore a 1970s photo with PhotoFlip
- Scan prints at 600–1200 DPI, 110 negatives at 4000 DPI, SX-70s gently on a flatbed.
- Upload to /restore for magenta correction and damage repair.
- For small-format family portraits, finish with /face-restore.
Frequently Asked Questions
It is the film. Early C-41 chromogenic prints from 1972 to 1976 develop a characteristic magenta shift as the yellow dye degrades faster than the cyan and magenta layers, leaving the image warm-tinted. PhotoFlip corrects this automatically by modeling the C-41 dye response and rebalancing the print to neutral. Skin tones in particular return to natural color.
Usually yes, depending on what caused the streak. If it is developer migration from uneven processing, the AI can often fill in the affected area using surrounding content. If the streak is actual damage to the image layer, the result depends on how much underlying detail survives. The face-restore model can rebuild faces even when backgrounds are partially lost to chemical migration.
Kodak introduced the E-6 process in 1976, replacing the less stable E-4. Slides made after 1976 use the improved dye chemistry and have aged dramatically better than their E-4 predecessors. If your 1978 slides look nearly perfect, that is why — the chemistry is fundamentally different even though the film is still called Ektachrome.
Always scan the negatives when you have them. 110 negatives are tiny (13x17mm) but they retain significantly more detail and color range than the small prints drugstores returned, and they have usually faded less than their printed counterparts. Use a dedicated film scanner at 4000 DPI and let PhotoFlip handle the color inversion and restoration.
Sources
Restore photos from other decades


Ready to restore a photo from the 1970s?
1 free preview on signup. No card required — credits unlock the download.
Upload a photo